15 Juneteenth Nail Ideas in Red Black and Green
Juneteenth celebrations have sparked a wave of creative expression through nail art, with red, black, and green designs taking center stage this year. These Pan-African colors carry deep meaning while offering endless possibilities for festive manicures.
From bold geometric patterns to delicate rose details, the color combination works beautifully across different nail lengths and personal styles. Matte finishes create modern sophistication, while glitter accents add celebratory sparkle.
You’ll find fifteen distinct approaches that range from subtle French tip variations to eye-catching tribal prints, each designed to honor the significance of freedom while keeping your nails festival-ready.
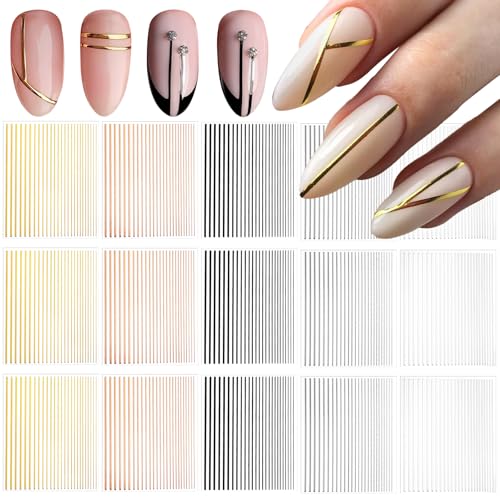
Trending on Amazon


1 Red Ombre Nails
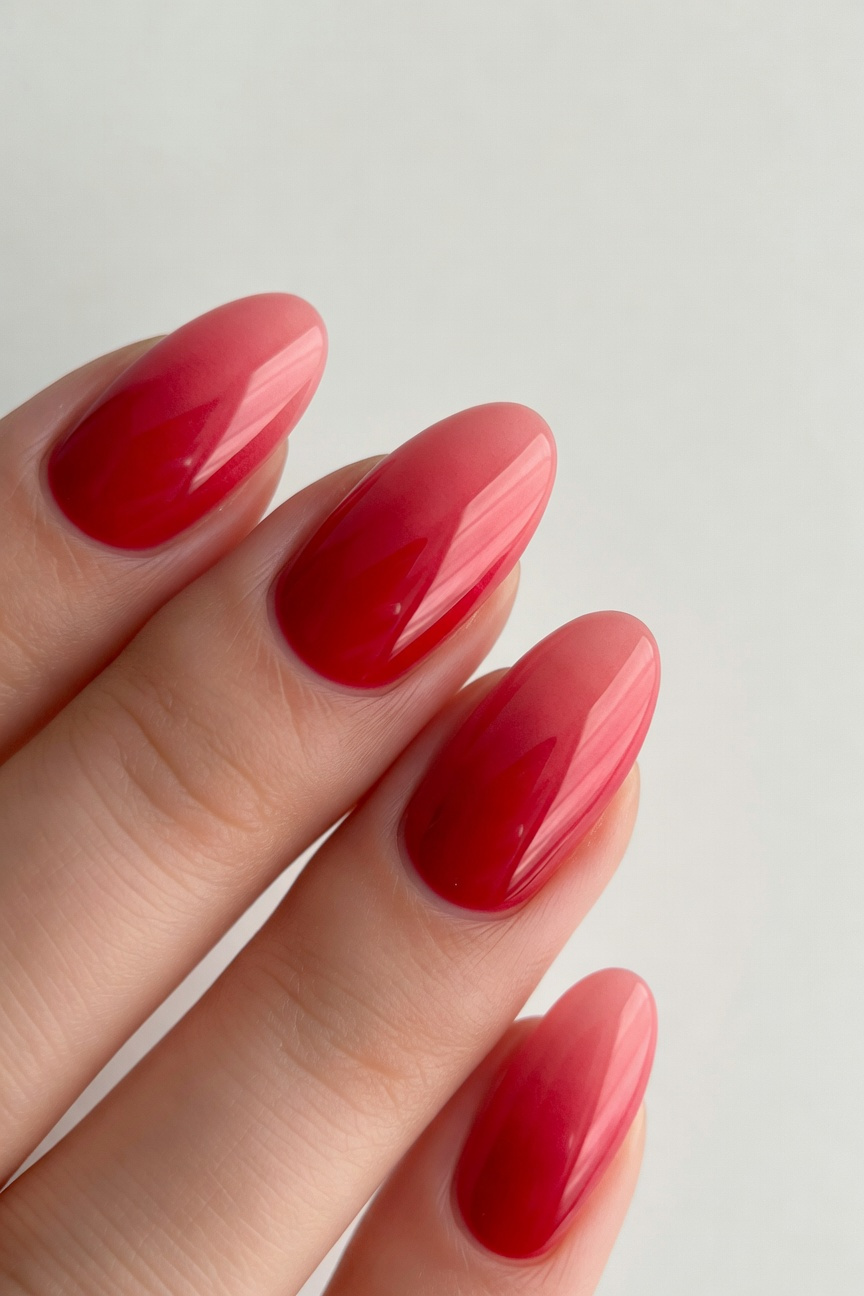


Red ombre nails transition from deep burgundy or crimson at the base to lighter coral or pink at the tips. This gradient technique pairs naturally with traditional African colors and gives your manicure sophisticated depth. Use a makeup sponge to dab the lighter shade over wet base polish for smooth blending.
The flowing color shift represents unity and strength – core Juneteenth values. Burgundy shades like OPI’s "We the Female" or Essie’s "Bordeaux" provide rich starting points that complement both black and green accent nails in your overall design.
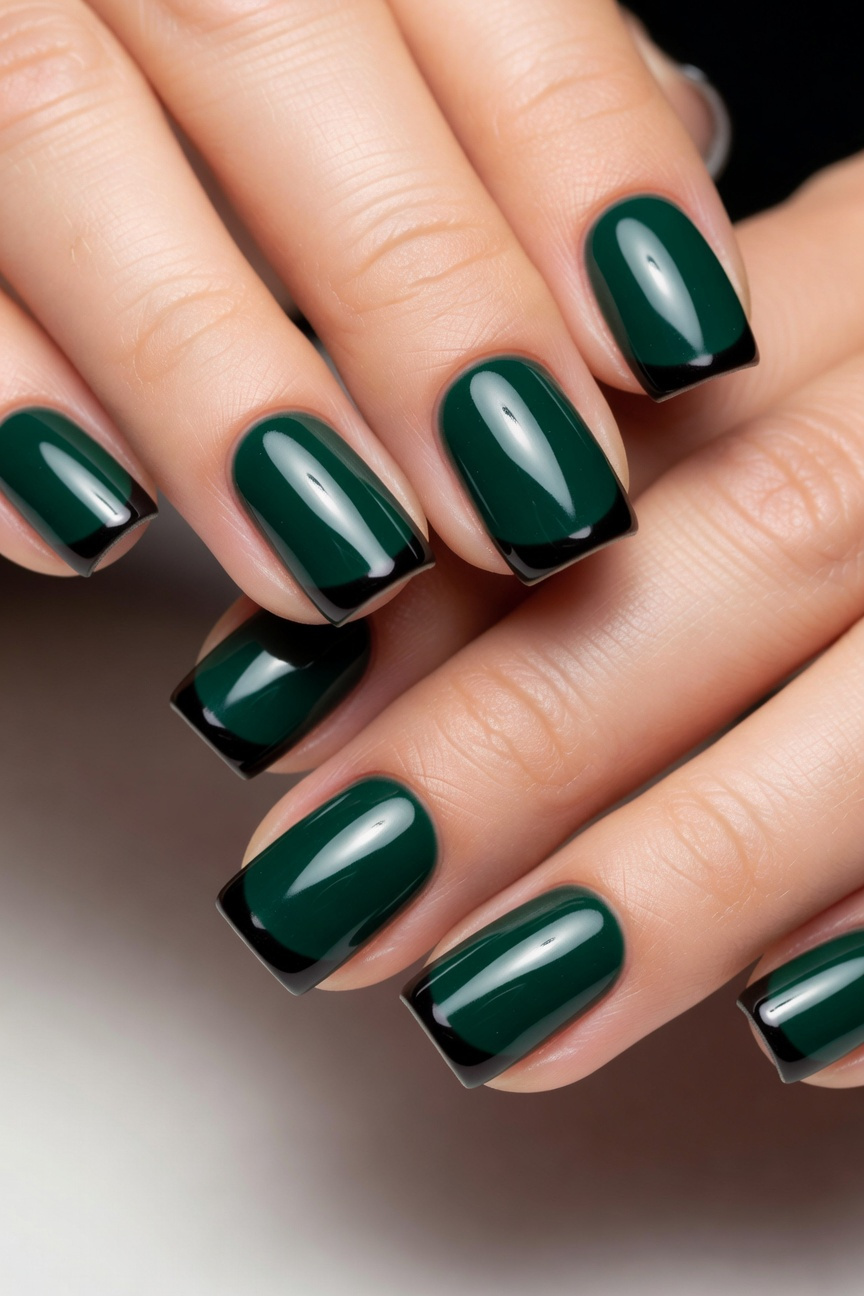
2 Black Matte Finish
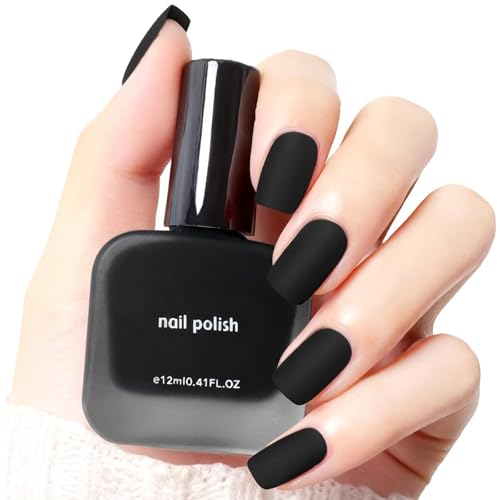


A jet-black matte base provides rich contrast that makes red and green accents pop dramatically. This sophisticated finish suits both minimalist single-color designs and complex patterns with multiple elements.
Apply thin, even coats to avoid streaking, then let each layer dry completely before adding details. Matte polish shows fingerprints easily, so finish with a light matte top coat for durability.
The velvety texture catches light differently than glossy finishes, giving your Juneteenth manicure an elegant, modern edge that photographs beautifully.
3 Green Glitter Accent
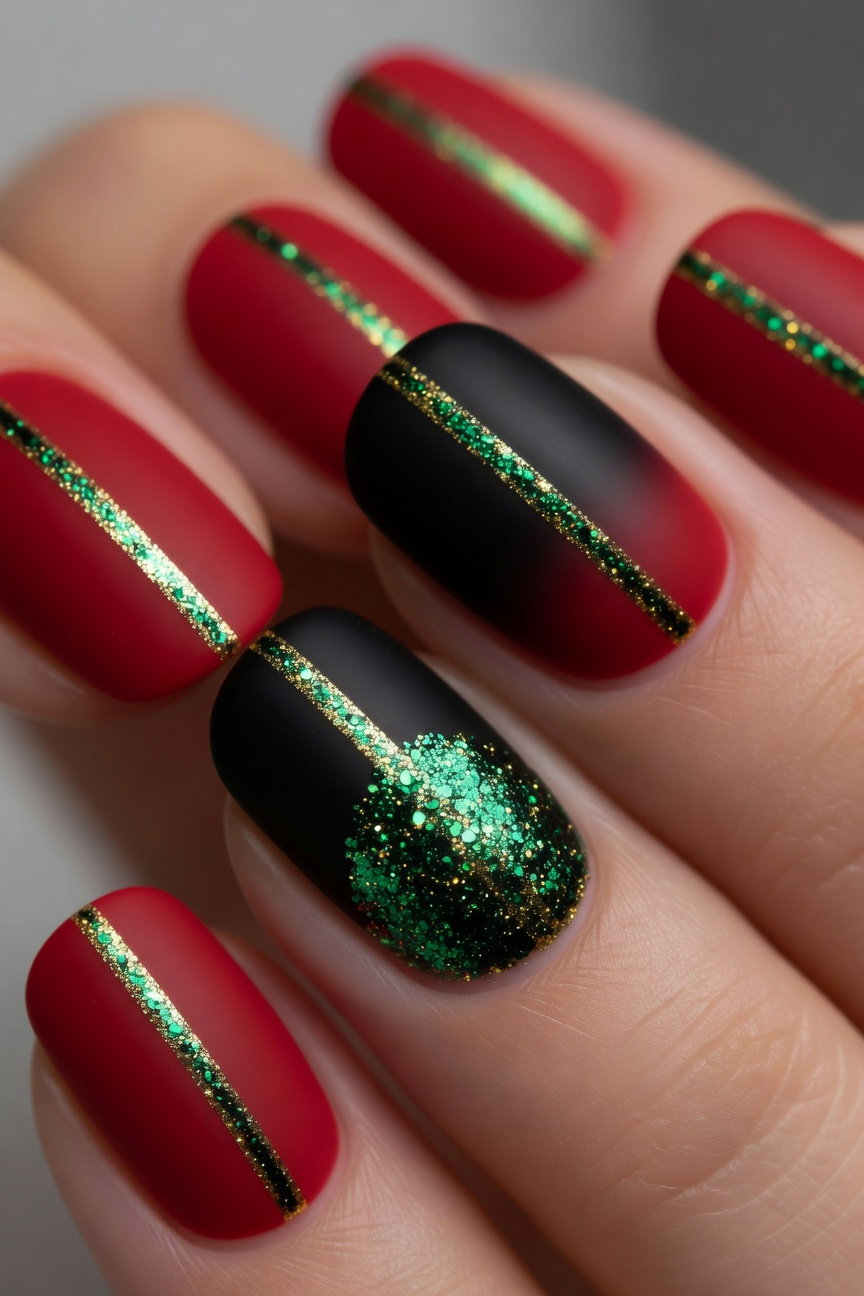
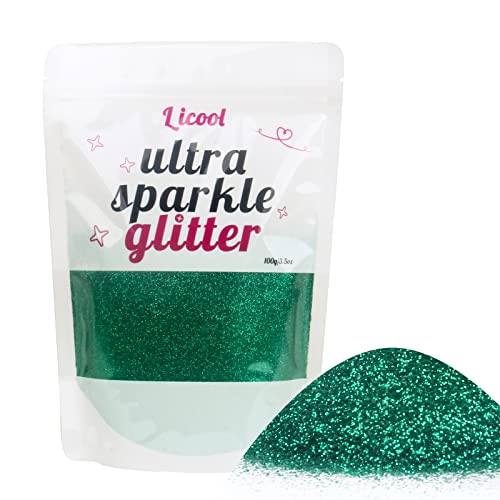


Apply fine green glitter along your cuticle line or as a thin stripe down the center of each nail. This subtle placement adds just enough sparkle without overwhelming the red and black base colors.
For extra dimension, press the glitter into slightly wet topcoat so it stays put through daily activities. Gold-toned green glitters catch light differently than silver-based ones, giving your nails a richer, more luxurious finish.
Even a single accent nail with green glitter can tie your whole Juneteenth manicure together while keeping the look wearable for any occasion.
4 Stripe Pattern Design
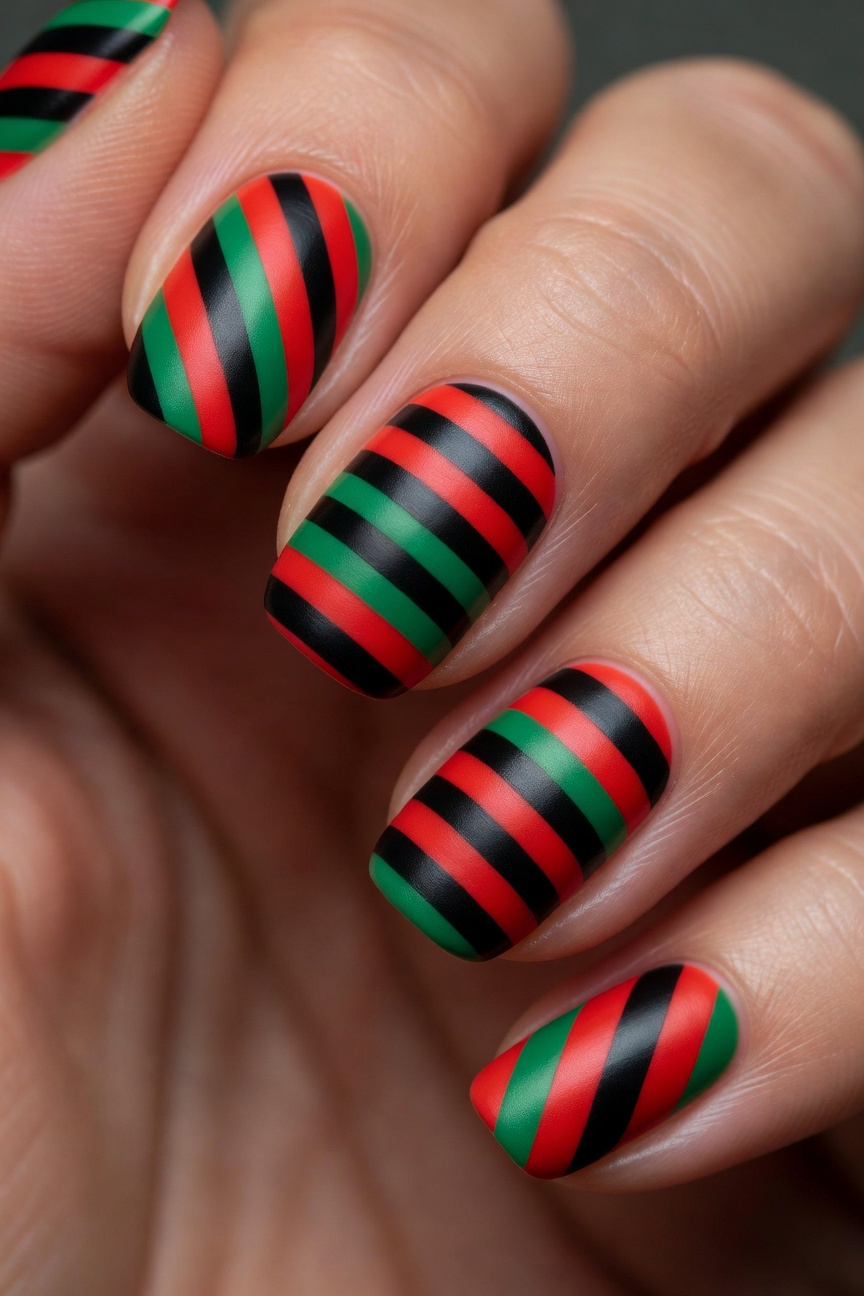


Diagonal stripes give you the most dynamic look for Juneteenth nails. Paint your base coat, then use striping tape at a 45-degree angle to section off clean lines. Apply red, black, and green in alternating bands, removing the tape while the polish is still slightly wet.
Horizontal stripes offer a classic approach that elongates shorter nails. Space them evenly using a thin brush or nail art pen—roughly 2-3mm apart depending on your nail length. This pattern lets each color shine equally and creates visual balance across all ten fingers.
5 Color Block Style
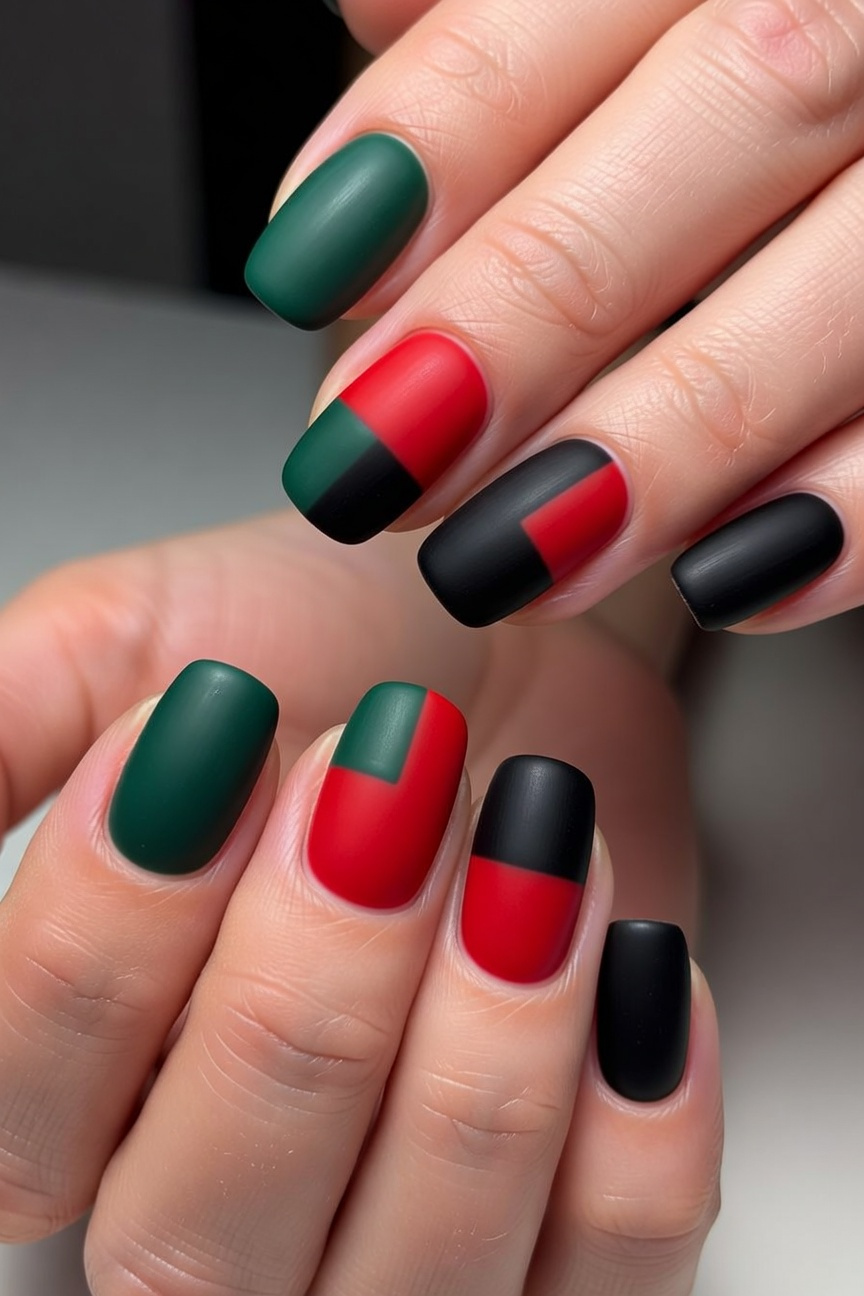

Paint each nail a solid color from your Juneteenth palette – deep forest green on your thumb, rich crimson on your index finger, and matte black on your middle finger. Continue the pattern across both hands, keeping the color sequence consistent.
This approach gives you bold impact without requiring detailed designs or steady brush control. Each shade gets equal attention, and the clean lines between colors create visual interest.
Try alternating the sequence on your second hand to add subtle variety while maintaining the cohesive theme.
6 Marble Effect Nails


Marble veining gives you that high-end stone look with surprisingly simple techniques. Use a thin brush or toothpick to drag white polish through your base color in flowing, irregular lines. Pan-African colors make this especially striking – try red marble veining over black, or green swirled through white.
The organic, flowing patterns mirror natural stone while keeping your design sophisticated. Each nail ends up unique since marble never repeats exactly. This technique also forgives small mistakes – real marble has imperfections, so yours can too.
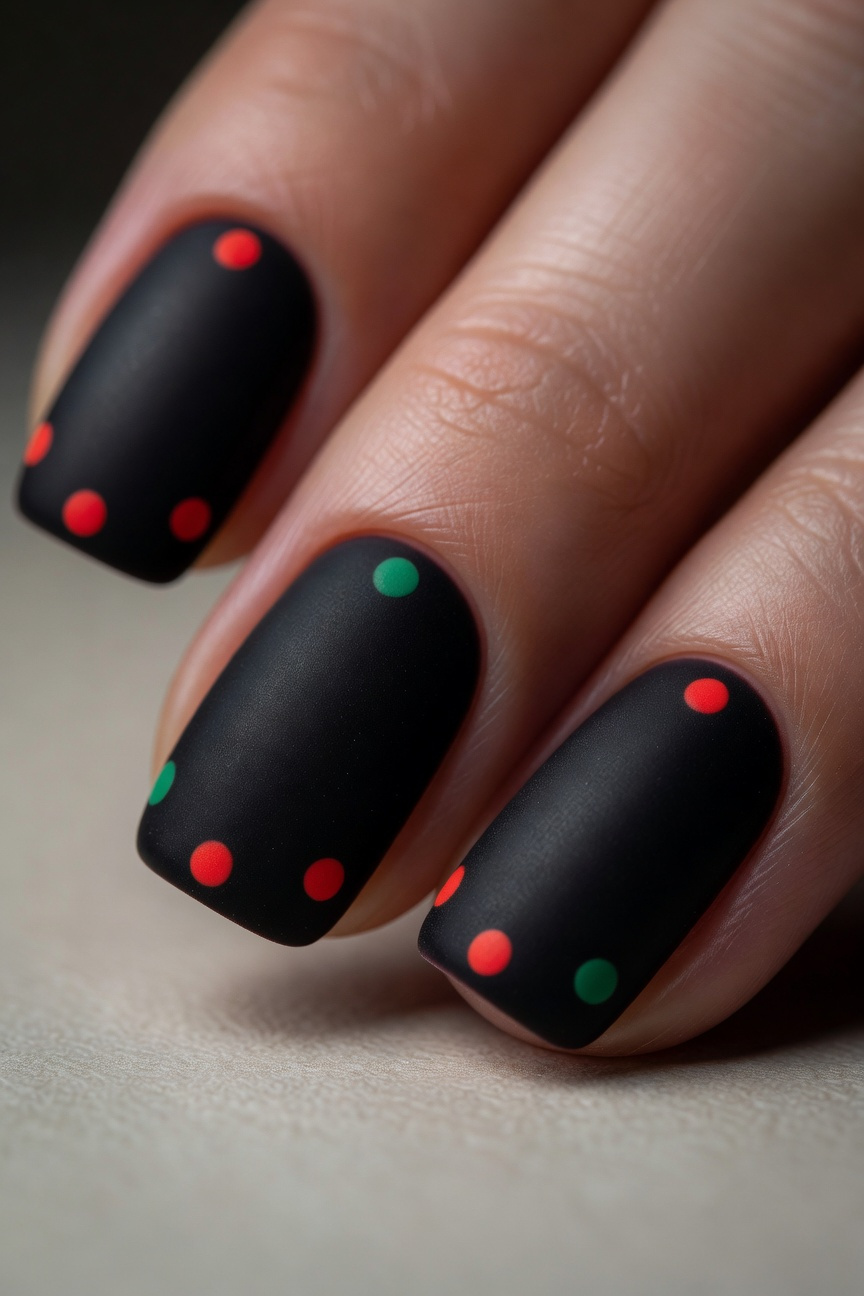
7 Geometric Shapes
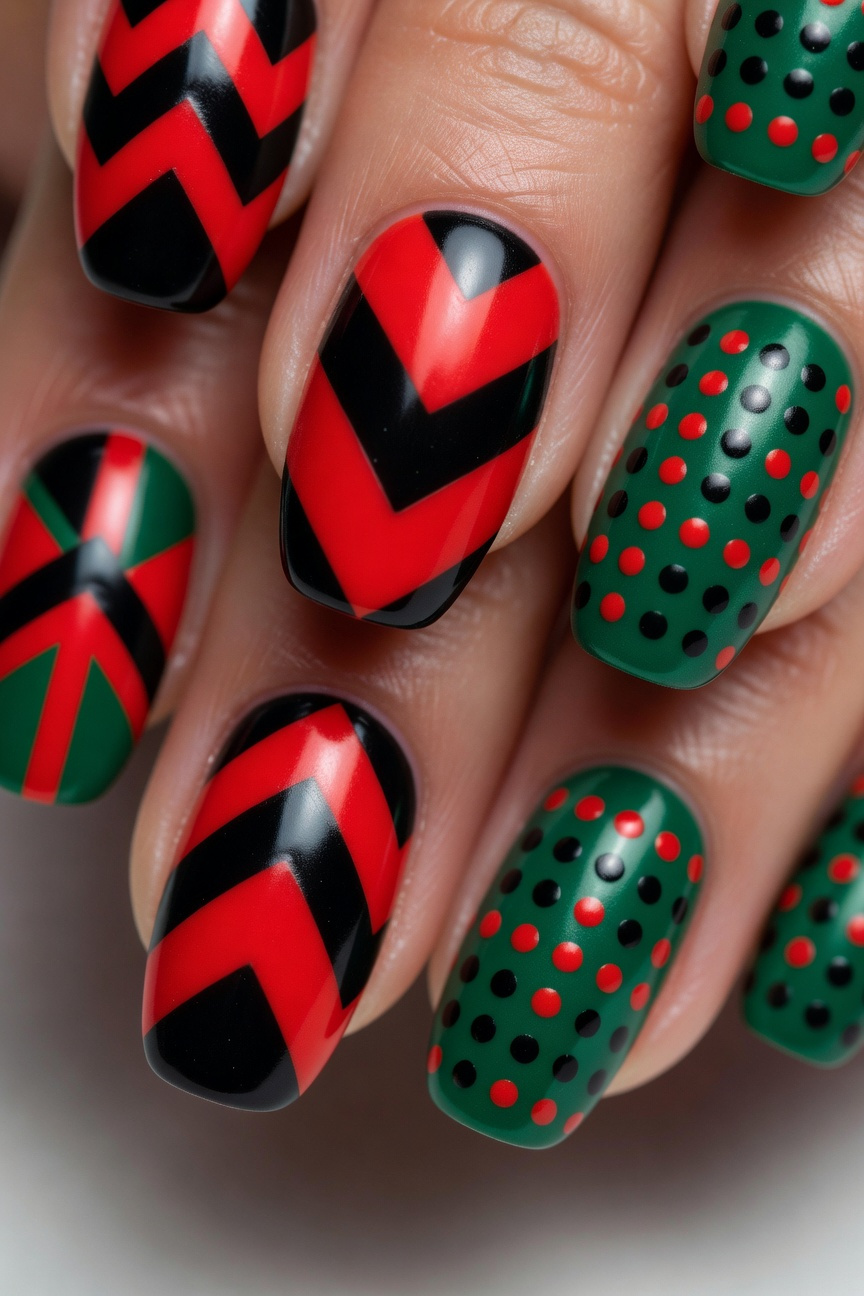

Try triangles alternating between red and black across your nails for a bold chevron pattern. Use nail tape to get those crisp, clean edges – it makes all the difference between a polished look and something that feels homemade.
Circles offer another striking option. Paint your base in green, then add red and black dots using a dotting tool or even a bobby pin. The contrast between the geometric precision and organic hand-painted feel gives your nails personality.
Geometric shapes let you incorporate all three colors without overwhelming your nails.
8 Flag Inspired Look
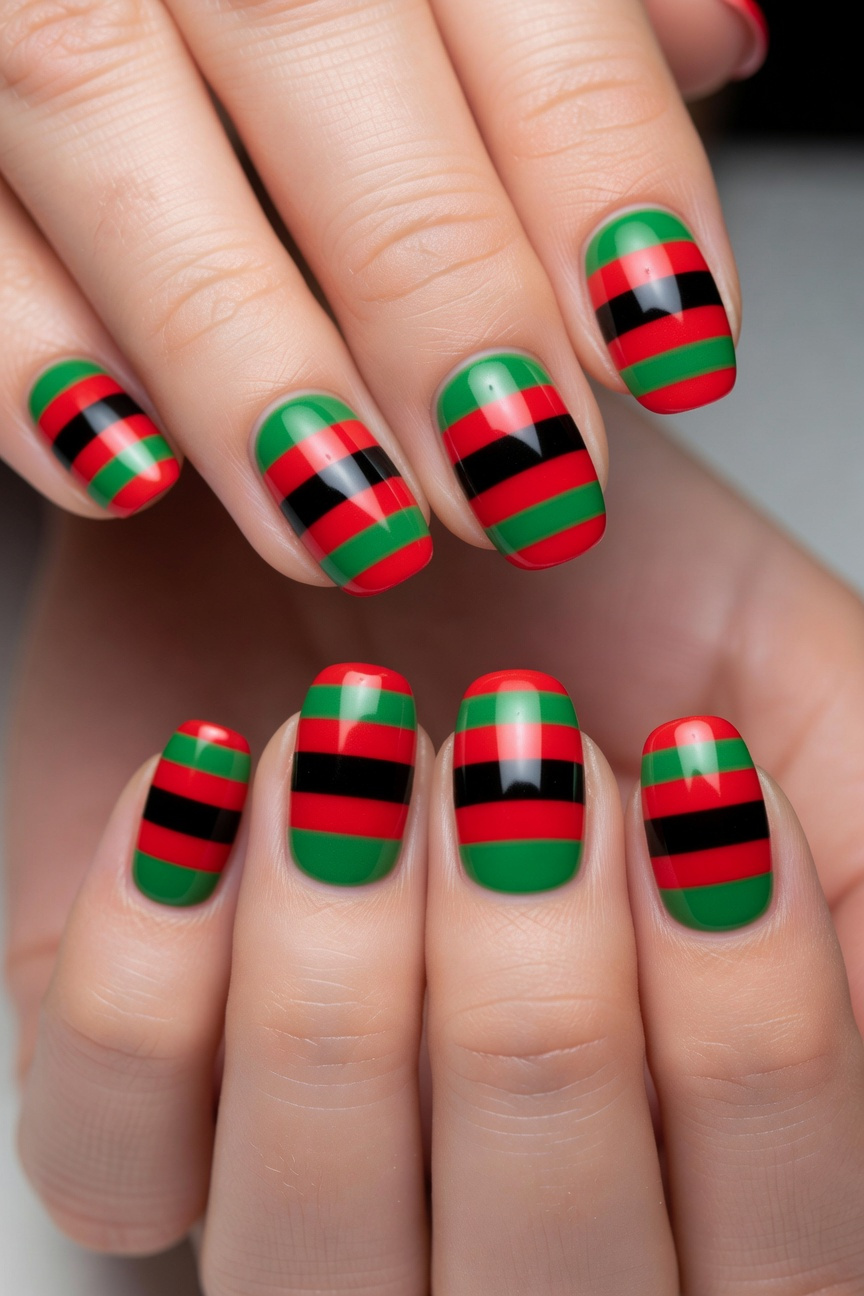
Paint horizontal stripes across your nails using red, black, and green polish in equal bands. This classic flag design gives you clean lines that represent the colors’ powerful symbolism while staying true to traditional Pan-African heritage.
Use striping tape or nail guides to keep your edges sharp and prevent bleeding between colors. Let each stripe dry completely before applying the next one.
The horizontal layout fits naturally on shorter nails and elongates the appearance of your nail bed. Try alternating the color order on different fingers for subtle variation.
9 Red Rose Details
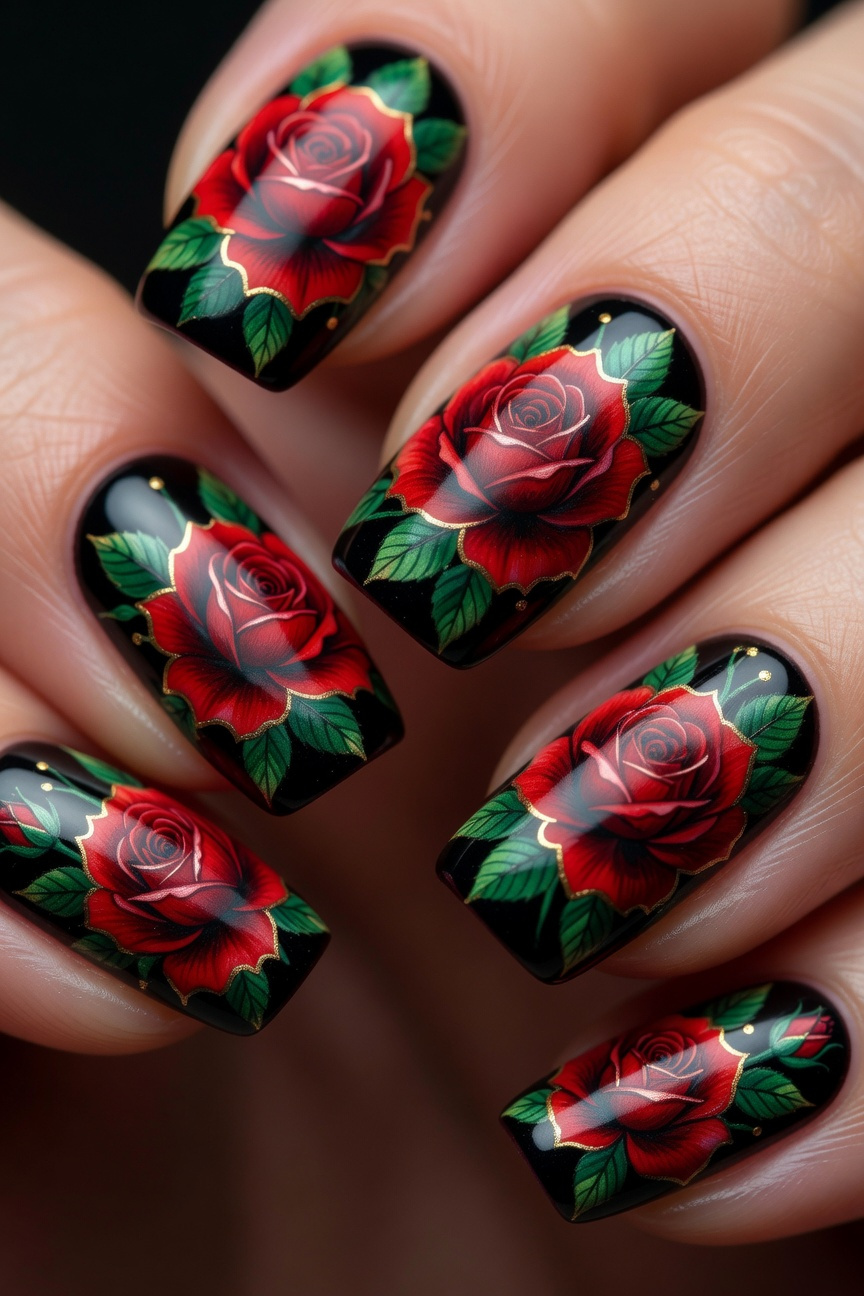


Red roses bring romantic elegance to Juneteenth nail art while honoring the holiday’s deeper meaning. Paint detailed rose blooms using a thin brush with crimson or burgundy polish, adding darker red centers and subtle black shading for dimension.
These floral designs pair naturally with green leaves or gold accents on accent nails. The rich red tones complement both professional settings and celebratory gatherings.
Try placing a single rose on each ring finger against a black base, or scatter smaller rose buds across all nails for a garden-inspired look that feels both festive and meaningful.
10 Black French Tips


Black French tips give your Juneteenth manicure a sleek, modern twist on the classic look. Instead of white, paint the tips in deep black for an elegant contrast against red or green base colors. The dark tips create sharp definition that feels both sophisticated and symbolic.
Apply the black polish with a thin brush for clean lines, or use nail guides if you want extra precision. This combination pairs especially well with a deep forest green base – the contrast makes both colors pop while keeping your nails polished and professional.
11 Green Leaf Art


Hand-painted leaves give you instant artistic flair without requiring advanced skills. Use a thin brush to paint simple leaf silhouettes in deep forest green, then add red veins or black outlines for depth. The organic shapes look natural even when they’re not symmetrical.
Try painting different leaf types across your nails – maple leaves on your ring finger, simple oval leaves on others. This approach lets you mix up the Pan-African colors while keeping the design cohesive and meaningful for your Juneteenth celebration.
12 Tribal Print Nails
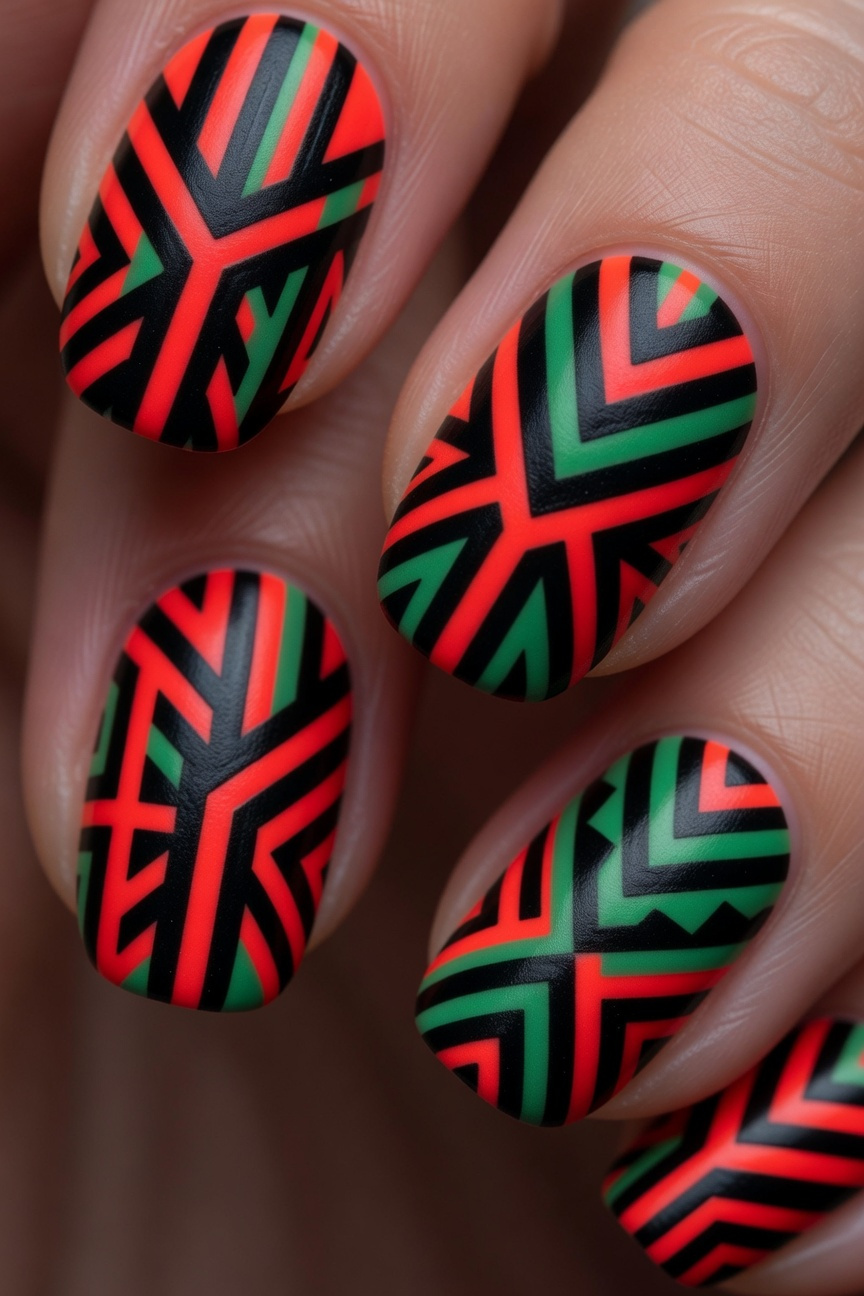


Geometric patterns and bold lines make tribal designs particularly striking on nails. Try alternating thick black chevrons with thin red stripes, or paint interlocking diamond shapes in all three colors on different fingers.
These patterns look most cohesive when you repeat similar shapes across your hand rather than mixing completely different designs. Angular motifs like triangles, zigzags, and stepped patterns capture that authentic tribal aesthetic.
The high contrast between red, black, and green ensures each design element stands out clearly, even on smaller nail surfaces.
13 Abstract Color Mix
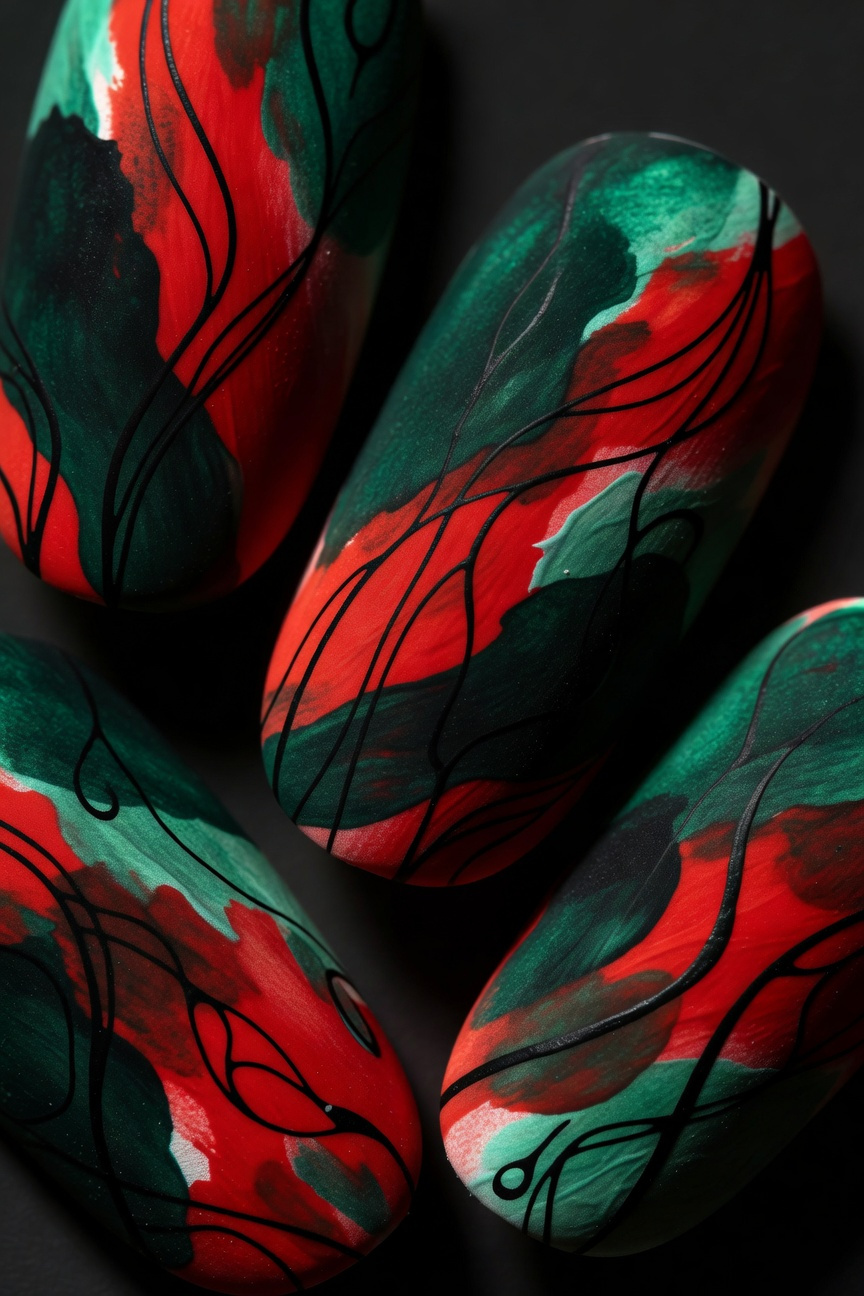
Abstract patterns let you express creativity without needing steady hands for precise shapes. Brush random strokes of deep emerald and crimson across each nail, then add thin black lines that weave between the colors. The overlapping hues create depth and movement that catches light from different angles.
Each nail can have its own unique pattern since abstracts thrive on irregularity. Sponging technique also delivers great results – dab colors randomly then blend the edges with a clean sponge. This approach gives you artistic flair that celebrates the holiday’s spirit through bold, expressive design.
14 Solid Color Set

Each nail gets the same vibrant shade—try deep forest green, rich crimson, or matte black for maximum impact. This approach lets the color itself carry the symbolic weight without competing elements.
The monochrome look feels intentional and polished, especially when you choose colors with cultural significance. Matte finishes give an understated elegance, while glossy topcoats make bolder statements.
Your color choice becomes the focal point, so pick shades that resonate with you personally. Deep, saturated tones tend to photograph better and maintain their visual impact throughout the day.
15 Pan-African Theme


Pan-African colors carry deep cultural significance that extends far beyond Juneteenth. Red represents the blood shed for freedom, black honors African heritage, and green symbolizes the rich lands of Africa. These symbolic meanings add powerful depth to your nail art choices.
Try alternating red and green on different nails with black accent details, or create geometric patterns inspired by traditional African textiles. Kente cloth designs translate beautifully to nail art using thin brush strokes in all three colors.
Each nail becomes a small canvas celebrating African identity and the ongoing journey toward equality.